Super-Cluster 6 • Sub-Cluster 6.1: Tech Pack, CAD, BOM & Fit Engineering (Blog #438)
Executive Technical Answer: How Do Technical Designers Diagnose & Correct Fit Sample Defects Without Triggering Endless Revision Loops?
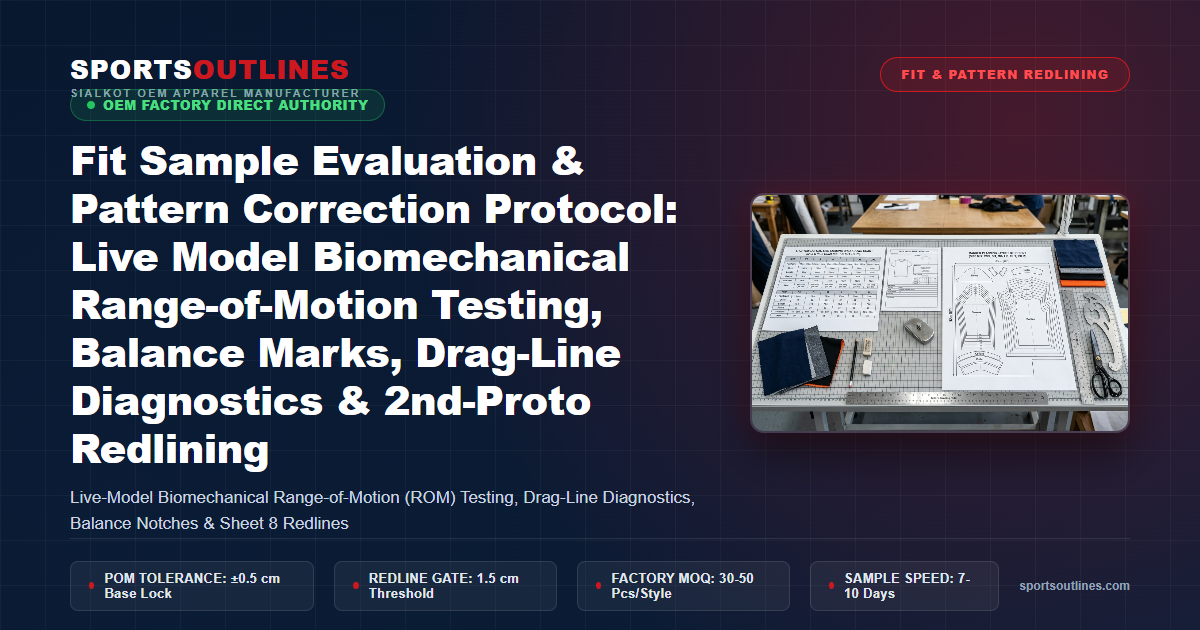
When your physical prototype (`Proto #1`) arrives from the factory, evaluating it by “putting it on a friend and saying the sleeves feel a bit weird” guarantees miscommunication on the CAD room floor. Industrial apparel fit engineering follows a strict 4-Phase Fit Evaluation & Pattern Redlining Protocol: Phase 1 (`Flat-Table Spec vs. Actual POM Audit`) separates factory sewing variance ($\Delta_{\text{sew}} = M_{\text{actual}} – M_{\text{spec}}$) from pattern design error ($\Delta_{\text{design}} = M_{\text{target}} – M_{\text{actual}}$); Phase 2 (`Static Plumb-Line & Balance Audit on a Base-Size Fit Model`) checks vertical side-seam perpendicularity, shoulder seam placement (`1.0 cm` forward of the acromion process), and hemline levelness; Phase 3 (`Dynamic 6-Axis Biomechanical Range-of-Motion & Drag-Line Vector Diagnostics`) reads fabric stress folds (`horizontal tension lines = insufficient circumference/width; diagonal radial whiskers = seam pitch or rise-angle mismatch; vertical baggy folds = excess cross-width`) across `120°` deep squats, `180°` overhead presses, and grappling sprawls; and Phase 4 (`3-Cycle AATCC 135 Wash-and-Dry Shrinkage & Torque Test`) verifies dimensional stability before translating every correction into millimeter-exact `Sheet 8` Redline Callouts for our Gerber AccuMark® CAD engineers. At Sports Outlines, we engineer physical prototypes in 7–10 business days ($45–$85/pc non-refundable sample fee) and lock your perfected fit into bulk production at 30–50 piece low MOQs.
The single greatest differentiator between a commodity `$12` promotional gym shirt and an `$85` cult-favorite athletic brand (`like Lululemon, Gymshark, Alo, or Arc’teryx`) is 3D Biomechanical Fit. An athlete can forgive a minimalist logo, but they will never forgive a compression legging that slides down the glutes during a deadlift, a rashguard that chokes the throat when shooting a double-leg takedown, or a heavyweight hoodie whose collar pulls backward and whose cuffs ride halfway up the forearm.
Yet 75% of emerging sportswear founders sabotage their own fit sessions by skipping flat-table measurements before putting the sample on a model—or by sending vague, emotional feedback (`”Make the shoulders look more athletic and fix the bunching under the arms”`) that a CAD pattern maker cannot enter into Gerber AccuMark®. Whether you are launching a private-label collection across the USA, UK, Canada, Germany, or Australia, this technical SOP gives you the exact diagnostic framework used by Tier-1 technical designers.
1. Phase 1: The Pre-Fit Flat-Table Audit (`Spec vs. Actual` Variance Decomposition)
Golden Rule #1 of Technical Design: NEVER put a prototype sample on a live model until you have rested it flat for 12–24 hours after unpacking and measured every single `POM A–Z` against `Sheet 2` of your tech pack!
Why is measuring the garment flat before the live fit session mandatory? Suppose your tech pack specified a Size Large `1/2 Chest (POM-A)` of `56.0 cm`, and when your fit model tries on `Proto #1`, the chest feels `2.0 cm` too tight (`1.0 cm` half-measure). If you don’t measure the garment flat first, you might tell the factory: “Increase Size L `1/2 Chest` on the tech pack from `56.0 cm` to `57.0 cm`.” But what if `Proto #1` actually measured `55.0 cm` out of the box (`-1.0 cm` off-spec due to over-steaming), and your `56.0 cm` tech pack spec was already 100% correct? By raising the tech pack spec to `57.0 cm`, your bulk garments will arrive `2.0 cm` too big! The Total Fit Revision Delta ($\Delta_{\text{new\_spec}}$) must always be calculated via the Two-Vector Variance Equation:
New_Tech_Pack_Spec = Actual_Sample_Measurement (M_actual) + Visual_On_Body_Adjustment (Delta_fit_on_model)
Look closely at that formula: your new tech pack specification is anchored to what the physical sample on the model’s body actually measured ($M_{\text{actual}}$) plus the physical pinned/draped adjustment ($\Delta_{\text{fit\_on\_model}}$) observed on the live model—completely eliminating any confusion between sample-sewing deviation and pattern-design intent!
| POM Code & Description (`Size L`) | Original Spec (`Rev 1.0`) | `Proto #1` Actual (`M_actual`) | Sample Variance (`Δ_sew`) | On-Model Fit Pin (`Δ_fit`) | Updated Spec (`Rev 2.0` = `M_act + Δ_fit`) |
|---|---|---|---|---|---|
| `POM-A` (`1/2 Chest Width`) | `56.0 cm` | `55.5 cm` | `-0.5 cm` (In tol) | `+1.5 cm` wider desired | `57.0 cm` (`+1.0 cm` net vs Rev 1) |
| `POM-D` (`HPS Front Length`) | `72.0 cm` | `73.2 cm` | `+1.2 cm` long | `-1.2 cm` shorter desired | `72.0 cm` (`Keep Rev 1 spec!`) |
| `POM-E` (`Across Shoulder`) | `48.0 cm` | `48.0 cm` | `0.0 cm` (Exact) | `+3.0 cm` drop-shoulder | `51.0 cm` (`Decrease sleeve -1.5 cm!`) |
| `POM-F1` (`Set-In Sleeve Length`) | `65.0 cm` | `65.0 cm` | `0.0 cm` (Exact) | `-1.5 cm` (Compensate ΔE) | `63.5 cm` (`Keeps total arm span fixed`) |
2. Phase 2: Reading “Drag Lines” & Stress Wrinkles (`The Physics of 3D Pattern Diagnostics`)
When a garment is worn on an athlete’s body, the fabric speaks to you through Stress Folds (“Drag Lines”). Every wrinkle or crease on a garment points directly toward the anatomical source of mechanical tension or excess volume! In our Sialkot pattern engineering room, we classify drag lines into four diagnostic vectors and apply their exact 2D Gerber AccuMark® geometric countermeasures:
- Horizontal Tight Tension Lines Across the Chest, Bust, Hip, or Thigh (`Circumferential Hoop Deficit`): Tight horizontal ridges pulling straight across the pectoral muscles, glutes, or upper quadriceps indicate that the horizontal pattern width (`POM-A`, `POM-N`, or `POM-P`) has insufficient ease (or excessive negative ease) for that body zone. CAD Fix: Release `1/2 Chest` or `1/2 Hip` by `+1.0 to +2.0 cm` (`+0.5 to +1.0 cm` per quarter pattern panel).
- Diagonal Radial “Whisker / Starburst” Lines Pulling Toward the Front Crotch (`Camel-Toe / Short Front Rise & Narrow Crotch Fork`): When diagonal tension lines radiate outward from the center-front crotch of leggings, spats, or joggers toward the hips, the pattern’s Front Crotch Extension (“J-Curve Fork Width”) is too shallow or the Front Rise (`POM-S1`) is too short—forcing the fabric to bridge across the pubic symphysis and pull into the labial/perineal cleft! CAD Fix: Replace a 4-way center-front/back cross-seam with a 3D Diamond or Parabolic Triangle Crotch Gusset (`14 cm × 6 cm`), extend the front/back inner-thigh crotch fork tip by `+0.8 to +1.4 cm`, and scoop the lower J-curve radius by `0.5 cm`.
- Diagonal Folds Pulling Backward from the Front Throat to the Armpits (`Forward-Shoulder Pitch & High Back-Neck Deficit`): A classic defect in hoodies and crewnecks where the front collar constantly chokes the athlete’s Adam’s apple and you have to tug the front hem downward every 2 minutes! Why does this happen? Because athletes have rounded, muscular upper backs (`trapezius/deltoid kyphosis`), which steals vertical length from the back panel (`CB Length`). CAD Fix: Shift the shoulder seam forward by `1.2 cm to 1.8 cm` (`taking 1.5 cm off the top of the front shoulder slope and adding +1.5 cm to the top of the back shoulder slope` so the total armhole perimeter remains unchanged!) and deepen `Front Neck Drop (POM-I1)` by `+0.8 cm`.
- Diagonal Drag Lines Under the Armpit When Raising Arms Overhead (`Low Sleeve-Cap Crown & High Underarm Bicep Bind`): If raising the arms to `90°` lifts the entire bottom hem of a jacket or jersey by `8 cm`, the Sleeve Cap Height (`Cap Crown`) is too tall and narrow (`tailored suit style`) and the underarm armhole depth (`POM-G2`) is cut too low down the ribcage! CAD Fix: Lower the sleeve cap crown height by `-1.5 to -2.2 cm`, widen the bicep (`POM-H`) by `+1.0 cm`, and raise the underarm scye pitch (or insert a `1-piece underarm diamond/axillary gusset`) so the sleeve rotates freely at `180°` overhead extension.
| Visual Fit Defect on Live Model | Drag-Line Vector Geometry | Biomechanical Root Cause in 2D Pattern | Exact Gerber AccuMark® CAD Pattern Correction |
|---|---|---|---|
| 1. Collar Chokes Front Neck / Hoodie Rides Back | Diagonal tension folds from front neck to underarm | Back shoulder slope & CB length too short for athletic traps; front neck drop too shallow | Forward-pitch shoulder seam `+1.5 cm` (`+1.5 cm` Back / `-1.5 cm` Front) + deepen `POM-I1` `+0.8 cm` |
| 2. Diagonal Folds Across Chest Into Armhole | 45° creases from bust/pectoral apex into front scye | Across-Front Chest (`12 cm` below HPS) is too wide or shoulder slope angle (`>24°`) is too steep | Scoop front armhole mid-scye inward by `-0.6 cm` & reduce shoulder drop angle from `23°` to `19°` |
| 3. “Camel-Toe” / Front Crotch Starburst Whiskers | Radial X-lines pulling into center-front crotch apex | 4-way center seam + shallow J-curve fork width + insufficient front rise length | Eliminate center seam below `7 cm` via `3D Triangle/Diamond Gusset` + extend crotch fork `+1.0 cm` |
| 4. Waistband Gaping at Lumbar Spine in Squat | V-shaped gap opening at center-back waistband | Straight rectangular waistband cut + short `Back Rise (POM-S2)` relative to gluteal radius | Contoured 3D anatomical yoke waistband (`top edge -2.5 cm narrower than bottom`) + `+1.8 cm` `POM-S2` |
| 5. Side Seams Twisting Forward Toward Shin/Belly | Outseam spirals `2–4 cm` off vertical plumb line | Pattern grainline rotated off-warp in marker OR front/back leg panel balance mismatch | Lock `0°` warp grainline parallel to knee-ankle balance line + Mahlo weft-straightened fabric (`<=1.5%` torque) |
3. Phase 3: The 6-Movement Biomechanical Range-of-Motion (`ROM`) Stress Protocol
Static mirror standing tests only evaluate `20%` of an athletic garment’s performance! Because human skin elongates by `+35% to +48%` longitudinally over the knee cap and gluteal crease during deep flexion and by `+28% to +36%` across the posterior deltoid and latissimus dorsi during overhead/grappling extension, every Sports Outlines prototype undergoes a mandatory 6-Exercise Biomechanical ROM Protocol on an athlete matching the Base Size (`Size Large` for men’s: `180 cm / 84 kg`, `104 cm` chest, `84 cm` waist; `Size Small/Medium` for women’s: `168 cm / 60 kg`, `88 cm` bust, `68 cm` waist, `96 cm` hip):
| Biomechanical ROM Test Drill | Anatomical Joint Extension | Primary Garment Stress Zone Audited | Quantitative Pass / Fail Engineering Gate |
|---|---|---|---|
| 1. `120°` Below-Parallel ATG Deep Squat (`10 Reps`) | Hip & knee flexion `>120°` (`+44%` glute skin stretch) | Leggings, Spats, Joggers, Fight Shorts | Posterior waistband slip `<= 0.8 cm`; `>=99.5%` opacity (`zero white-out`); zero crotch seam pop |
| 2. `180°` Overhead Barbell Press / Pull-Up Hang | Glenohumeral abduction `180°` (`+34%` axillary stretch) | Rashguards, Tees, Hoodies, Alpine Shells | Bottom hem vertical lift `<= 3.5 cm` (`<= 1.5 cm` w/ gusset); zero deltoid/bicep bind |
| 3. Cross-Body Horizontal Bear-Hug / Guard Pull | Scapular protraction (`+28%` across-back expansion) | BJJ Gi Jackets, Track Jackets, Boxing Robes | Across-back yoke (`14 cm` below CB neck) allows full reach without cuff receding `>2.5 cm` |
| 4. `165°` High Head-Kick (`Jodan Mawashi-Geri`) | Femoral abduction & external hip rotation `>150°` | Muay Thai Shorts, MMA Fight Shorts, Gi Pants | Outseam side-slit & diamond gusset create `0.0 N·m` lateral thigh catch at peak kick height |
| 5. High-Impact Jump-Rope / Box-Jump (`60 Sec`) | `2.5–3.2 G` vertical harmonic breast/waist oscillation | Sports Bras, Crop Tops, Drawcord Jogger Pockets | Underbust `40 mm` elastic band stays `100%` anchored; smartphone in zip pocket has `<2.0 cm` swing |
4. Phase 4: The Mandatory 3-Cycle `AATCC 135` Wash, Dry & Spirality Test on `Proto #1`
Once your live model fit session is photographed and pinned, there is one final destructive test you must perform on `Proto #1` before approving bulk cutting: Wash and dry the prototype 3 times in a home washing machine (`40°C` warm cycle + tumble dry low per `AATCC 135 / ISO 6330`), then re-measure every `POM` on the flat table!
Why is testing `Proto #1` in the wash so valuable? Because even pre-shrunk, compact-stentered `450 GSM` 100% cotton French Terry exhibits `-1.8% to -2.8%` residual lengthwise relaxation during its first customer tumble-dry cycle. By measuring the exact post-wash delta on `Proto #1` ($\Delta S_{\text{warp}} = \frac{L_{\text{after}} – L_{\text{before}}}{L_{\text{before}}} \times 100\%$), you verify three critical metrics before a single bulk roll is cut:
- 1. Shrinkage-Compensated CAD Pattern Scaling: If your `72.0 cm` hoodie shrinks to `70.2 cm` (`-2.5%`) after 3 washes and you want the garment to measure `72.0 cm` after the customer washes it, our CAD team locks a `+2.5%` warp shrinkage allowance into the bulk Gerber marker (`cutting at 73.8 cm` pre-wash).
- 2. Seam Spirality / Twisting Audit (`AATCC 179 <= 2.0%`): Checks that single-jersey and fleece side seams do not torque diagonally after laundering.
- 3. Differential Zipper & Embroidery Puckering Check: Confirms that the `#5` center-front zipper tape does not turn into a wavy “rollercoaster” when the adjacent cotton fleece shrinks by `-2%` (prevented by pre-steaming zipper tapes at `110°C` prior to sewing!).
| Amateur Vague Fit Comment (Causes Factory Errors) | Professional `Sheet 8` Technical Redline Callout (100% Deterministic) | Gerber CAD Action Triggered |
|---|---|---|
| “The neck hole feels too big and sloppy.” | “Reduce `POM-J (Inside Neck Width)` from `19.5 cm` to `18.0 cm` (`-1.5 cm`); raise `POM-I1 (Front Neck Drop)` by `-0.8 cm` (`from 9.5 cm to 8.7 cm`); change collar rib cut ratio from `82%` to `76%` of neck seam perimeter.” | Tightens neck opening & increases rib recovery tension so collar hugs clavicle flat |
| “Make the hoodie slightly more boxy and cropped.” | “Increase `POM-A (1/2 Chest)` from `58.0 cm` to `61.5 cm` (`+3.5 cm`); increase `POM-E (Across Shoulder)` from `52.0 cm` to `56.0 cm` (`+4.0 cm`, reduce `POM-F1 Sleeve` by `-2.0 cm`); reduce `POM-D (HPS Length)` from `71.0 cm` to `67.5 cm` (`-3.5 cm`).” | Shifts shoulder drop `+2.0 cm` per side without lengthening sleeves & crops torso |
| “The leggings feel tight behind the knees.” | “Increase `POM-Q (1/2 Knee Width at 32 cm below crotch)` from `15.2 cm` to `16.4 cm` (`+1.2 cm` half-measure = `+2.4 cm` total circumference); keep `POM-P (Thigh)` and `POM-R (Ankle)` unchanged.” | Bows inseam/outseam splines outward by `+0.3 cm` per edge strictly at knee node |
| “The chest logo is too high up near the collar.” | “Move Center-Chest Graphic `Y-coordinate` down by `+2.5 cm`: change vertical drop from `6.0 cm` below Center-Front Collar Seam (`CFN`) to `8.5 cm` below `CFN` in Size Large.” | Updates laser alignment jig coordinate on screen-print/heat-press platen |
5. Decision Matrix: When to Proceed Straight to `PPS / Bulk` vs. When to Order a `2nd Fit Proto`
Once you have redlined `Sheet 8` of your tech pack (`Rev 2.0`), should you move straight into bulk production (`with a Pre-Production Sample confirmation`) or order a standalone `2nd Fit Prototype` (`$45–$85/pc`, `5–7 days`)? Use this proven 1.5 cm Structural Threshold Rule:
| Magnitude & Type of `Proto #1` Fit Revisions | Risk of Unforeseen 3D Drape Shift | Recommended Next Step | Schedule Impact |
|---|---|---|---|
| Category A: Minor Linear Tweaks (`<= 1.5 cm` on Length/Chest/Sleeve or Logo Position Shift) | Near Zero (`<1%` risk) | Proceed Directly to Bulk PO + Digital/Physical `PPS` Verification | `0 Days` Delay (`85%` of all styles) |
| Category B: Moderate Contour Tweaks (`1.5–2.5 cm` Waist/Hip Taper or Collar Rib Ratio Change) | Low (`~5%` risk) | Approve Bulk PO Subject to Pre-Cut `PPS` Tape-Measure & Mannequin Video Gate | `+3–4 Days` Pre-Cut `PPS` Check |
| Category C: Major Architecture Overhaul (`Switching Set-In to Raglan, Changing Fabric GSM by >60 GSM, or Re-Drafting Crotch Rise/Armhole Pitch >2.5 cm`) | High (`3D balance changes`) | Order a Dedicated Physical `2nd Fit Proto` (`$45–$85/pc`) Before Placing Bulk PO | `+5–7 Business Days` (`Protects bulk ROI`) |
5B. Pattern Balance Marks (`V-Notches & T-Notches`), Sleeve Pitch Angles & Live Video Fit Conferencing
Why do some garments twist spirally around the wearer’s torso or develop diagonal torque folds across the biceps even when the flat chest width (`POM-A`) and sleeve length (`POM-F`) measure 100% on spec? The engineering cause is almost never a linear width error—it is a Pattern Balance Mark (`Notch`) Misalignment or an incorrect Forward Sleeve Pitch Angle inside the CAD pattern block.
In industrial garment construction, curved and long seams cannot simply be sewn end-to-end by eye. As operators feed stretchy knitted panels through a `5,500 RPM` 4-thread overlock (`ISO 514`) or 4-needle 6-thread flatlock (`ISO 607`) machine, the presser foot pushes the top ply slightly faster than the bottom feed dogs pull the lower ply—a mechanical phenomenon known as Ply Shift (`or Differential Feed Creep`). To prevent the front panel of a legging or hoodie from walking `+1.5 cm` past the back panel by the time the operator reaches the hem, our Gerber AccuMark® pattern masters engineer precision Perimeter Balance Marks (`2.5 mm × 2.5 mm Perimeter Notches`) into every pattern piece:
- 1. Armhole-to-Sleeve-Cap Balance Notches (`Single Front Notch vs. Double Back Notch`): A human shoulder joint does not hang straight down; it pitches forward by `12° to 18°` (`and up to 24° in cycling jackets, boxing robes, and BJJ rashguards`). Therefore, the front armhole curve (`scye`) is carved deeper than the back armhole curve. Our CAD blocks place 1 single notch on the front armhole/sleeve cap (`7.5 cm above the underarm seam`) and 2 double notches on the back armhole/sleeve cap (`8.5 cm above the underarm seam`), plus a crown apex notch at the shoulder seam. If a sample displays diagonal spiral drag lines down the arm during your live-model evaluation, rotating the sleeve cap apex notch forward by `+0.8 cm to +1.4 cm` (`Forward Pitch Adjustment`) instantly eliminates arm torque without altering sleeve width!
- 2. Legging & Jogger Inseam/Outseam Knee Control Notches: On long tapered lower-body garments (`70–78 cm inseam`), operators match mid-thigh and knee balance notches so that ease distribution above and below the patella remains 100% symmetrical between left and right legs—preventing the dreaded “twisted ankle seam” defect.
- 3. Collar Quarter-Point (`1/4 Split`) Balance Notches: Rather than stretching a rib-knit collar band unevenly around the neck opening, both the neckline seam and the `1×1` rib collar loop are notched at exact `0° (Center Back)`, `90° (Left Shoulder)`, `180° (Center Front)`, and `270° (Right Shoulder)` quadrants. This guarantees uniform `76%` rib tension around the entire `360°` neck circumference.
To accelerate `Sheet 8` fit redlining for our USA, UK, Canada, Germany, and Australia B2B partners, Sports Outlines pairs your written redline worksheet with a 15-Minute Live Screen-Share CAD Review. While you show the pinned garment on your fit model via video call, our Senior Pattern Master opens your actual Gerber AccuMark® `.PDS` block on screen, demonstrates the exact spline node shifts in real time, and locks your `Rev 2.0` pattern file on the spot—eliminating miscommunication and cutting weeks off your pre-production calendar.
6. Frequently Asked Questions (FAQ): Sportswear Fit Evaluation & Pattern Correction
Q1: Why does increasing `Across Shoulder Width (POM-E)` by `+3.0 cm` automatically make the sleeves `+1.5 cm` longer on the body if I don’t adjust `POM-F1`?
In a set-in or drop-shoulder garment, total arm coverage from the spine to the wrist equals $\frac{1}{2}\text{POM-E} + \text{POM-F1}$. If you widen `Across Shoulder (POM-E)` by `+3.0 cm` (`+1.5 cm` drop per shoulder), the armhole seam moves `1.5 cm` further down the deltoid—pushing the entire sleeve cuff `1.5 cm` past the wrist unless you simultaneously shorten `Set-In Sleeve Length (POM-F1)` by `-1.5 cm`!
Q2: How do you fix a hoodie or t-shirt collar that ripples (“bacons”) or stands away from the back of the neck?
A rippling or gaping crew neckline is caused by cutting the `1×1` or `2×2` rib collar strip too long relative to the garment’s curved neck-seam circumference (`e.g., >85% ratio`) or omitting elastane from the rib knit. Setting the **Cut Collar Rib-to-Neck-Seam Ratio to `74%–78%`** using a `95% Cotton / 5% Lycra®` high-recovery rib and contouring the back-neck drop to `2.2–2.5 cm` pulls the collar flat against the trapezius and clavicle.
Q3: What is the cost and turnaround time if I need a 2nd Fit Sample after changing my garment’s design?
Physical pre-production prototype sampling (including `Proto #1` or a structural `2nd Fit Proto`) is strictly $45–$85 per piece/pair/set as a non-refundable development fee with a 5–10 business days production turnaround. Minor linear adjustments (`<=1.5 cm`) do not require a paid 2nd fit sample and are locked directly into your bulk Pre-Production (`PPS`) setup.
Q4: Should I fit-test my prototype in Size Small, Size Medium, or Size Large?
Always fit-test your prototype in the Median Center-of-Bell-Curve Base Size: **Men’s `Size Large (L)`** (or `Medium` for slim-fit endurance cycling/running) and **Women’s `Size Small (S)` or `Medium (M)`**. Grading upward (`XL–3XL`) and downward (`XS–S`) from the median size minimizes cumulative allometric distortion across the size spectrum.
Q5: Once my fit adjustments are finalized on `Sheet 8`, what is the bulk MOQ?
Our factory-direct bulk MOQ is strictly 30–50 pieces/pairs/sets per style/colorway across mixed sizes (`XS` to `3XL`).
Need Expert Gerber AccuMark® Pattern Engineering & Fit Diagnostics?
Partner with Sialkot’s technical CAD and prototyping specialists. We build physical prototypes in 7–10 business days ($45–$85/pc non-refundable sample fee), translate your fit redlines with millimeter precision, and scale bulk production at 30–50 piece low MOQs.